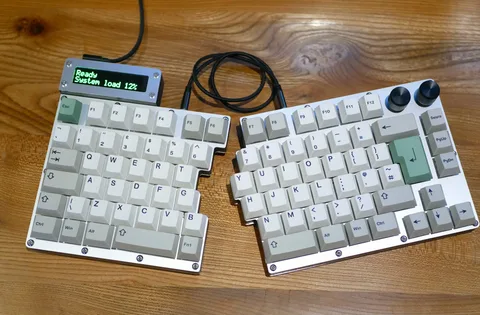
If you’re a keyboard enthusiast or someone looking to enhance your typing experience, customizing your 75 keyboard can be a rewarding project. The 75 keyboard layout offers a compact design with all the essential keys, making it a favorite for both productivity and gaming. In The Ultimate Guide to Customizing Your 75 Keyboard, we’ll walk you through everything you need to know—from selecting components to fine-tuning your setup for optimal performance.
Why Customize Your 75 Keyboard?
The 75 keyboard strikes a balance between functionality and compactness, but customization allows you to tailor it to your specific needs and preferences. Whether you want a unique aesthetic, improved typing feel, or enhanced features, customizing your 75 keyboard can transform a standard device into a personalized powerhouse.
Choosing the Right Components
Switches
One of the most critical aspects of customization is selecting the right switches. Mechanical switches come in various types—linear, tactile, and clicky—each offering a different typing experience. Consider your typing style and noise preference before choosing.
Keycaps
Keycaps influence both the look and feel of your keyboard. PBT keycaps are popular for their durability and texture, while ABS keycaps tend to be smoother but less resistant to wear. You can choose from different profiles such as SA, DSA, or OEM to further customize the typing feel.
Case and Plate
The keyboard case and plate affect the sound and typing experience. Aluminum cases provide a solid, premium feel, while plastic cases are lighter and often more affordable. The plate material—brass, aluminum, or polycarbonate—also influences acoustics and key stability.
Programming and Layout Customization
Many 75 keyboards support QMK or VIA firmware, allowing you to remap keys, create macros, and program layers. This is especially useful if you want to maximize productivity or gaming efficiency. For example, you can assign frequently used shortcuts or multimedia keys to easily accessible buttons.
The Ultimate Guide to Customizing Your 75 Keyboard: Step-by-Step
- Research and Plan
Identify what improvements you want—better typing feel, aesthetic changes, or added functionality. - Gather Components
Purchase switches, keycaps, and any necessary tools like a switch puller or soldering kit. - Assemble the Keyboard
Carefully install switches into the plate and case, solder if needed, and attach keycaps. - Flash Firmware
Customize the layout and program macros using compatible software. - Test and Refine
Use your keyboard extensively to ensure everything works smoothly and tweak settings as needed.
Final Thoughts
Customizing your 75 keyboard can be an enjoyable and fulfilling endeavor. It enhances not only the aesthetics but also the functionality of your device. Following The Ultimate Guide to Customizing Your 75 Keyboard ensures that you make informed decisions and get the most out of your keyboard customization journey.


